
It's Wednesday!! Imogen is going out for lunch with Grandma for a few hours and today I have nothing else planned except to craft, so I'm rather looking forward to locking myself away in the craft room for a while.
Today I have created this GORGEOUS 4" x 4" x 1" gift box in the Beautiful noble peacock foiled cardstock. Added interest is created by adding a die cut word to the lid.

Measurements
Noble peacock speciality DSP
1pc - 11" x 6"
Window Sheet
1pc - 3 7/8" x 3 7/8"
Place your DSP into the simply scored and score as follows
Long side - 1", 5", 6" & 10"
Short side - 1" & 5"
Holding the DSP horizontally, cut up the score lines to meet the horizontal and notch into the squares, repeat this for the opposite side and you will have a piece that looks like this..

Now, turn your DSP so it's vertical and place the Thank You die centrally into the large square section and hold in palce with a bit of washi tape, like so..

Run this through your die cutting machine, and the gently remove the die making sure you keep hold of all the pieces within it. So your piece of cars will look like this, don't worry it's supposed to look a little odd right now.

Flip the DSP over and add the window sheet to the section where you have die cut. Turn it the right way around and put the Thank you back into the space.

Take all the little pieces that are left from the cutting and start adhering them back into there correct place, so you end up with this
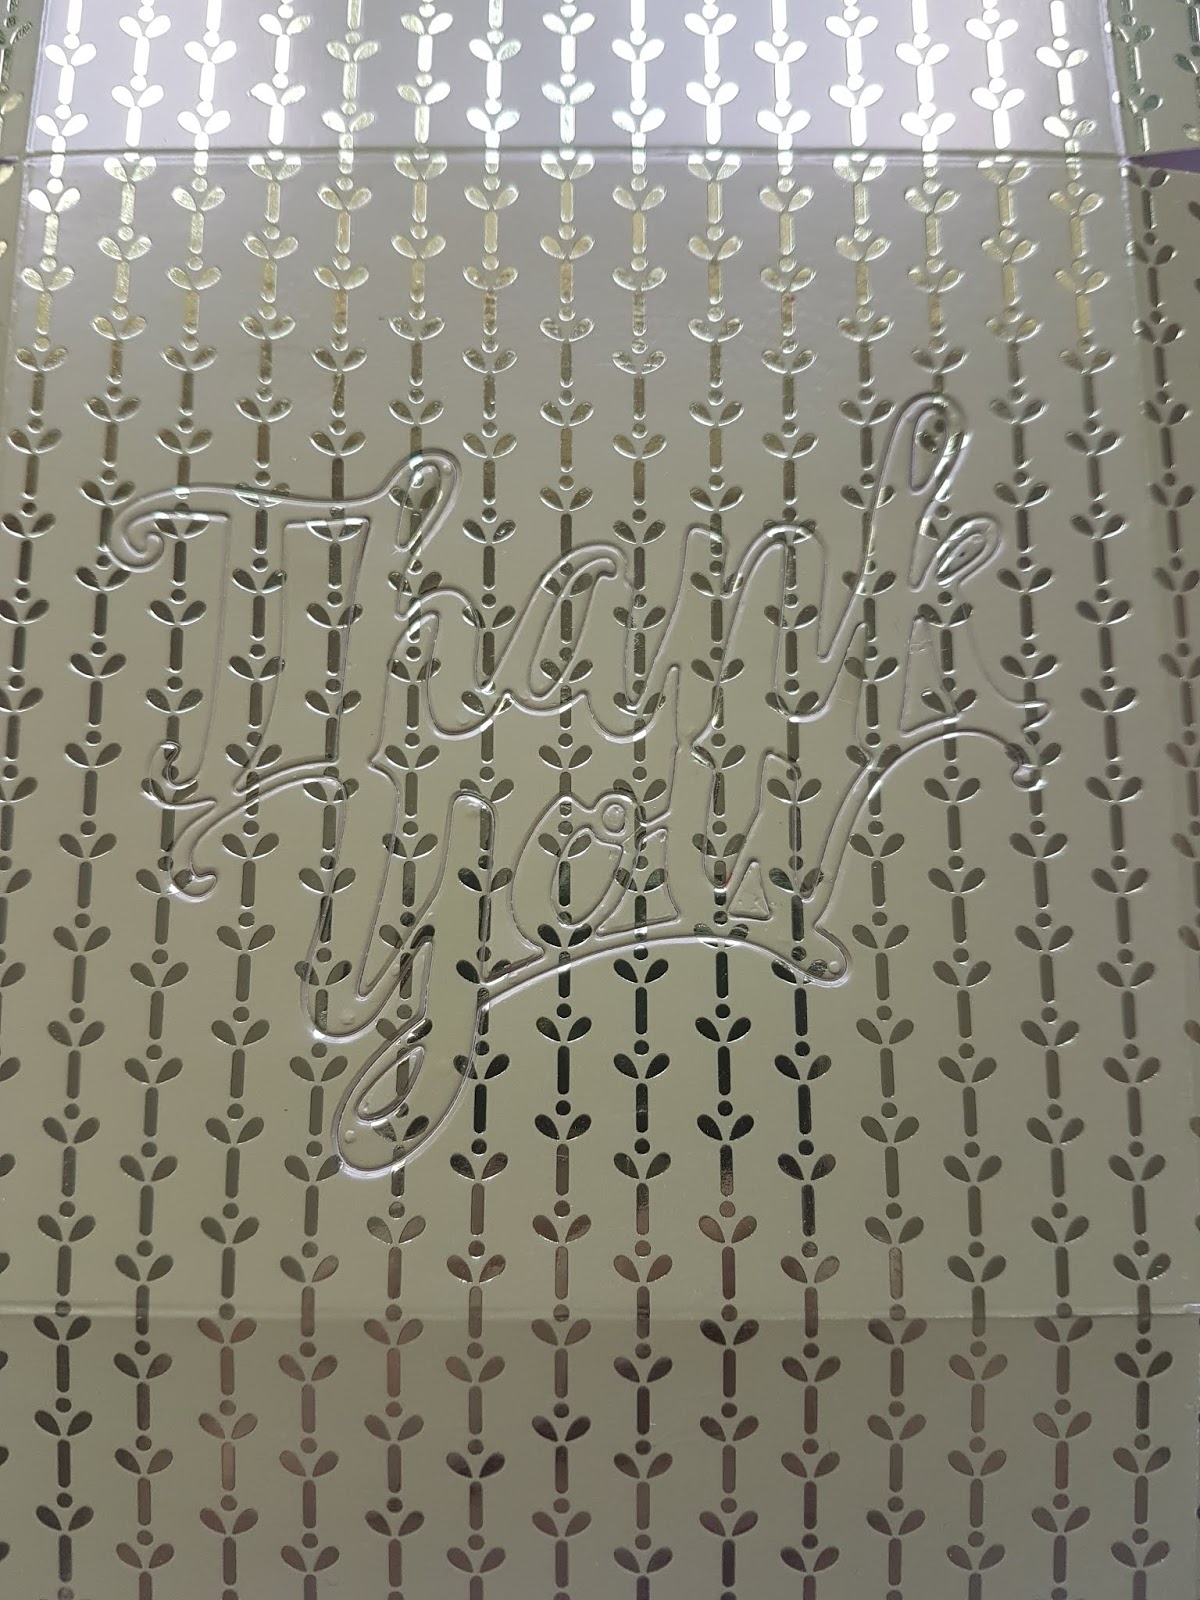
Next, gently remove the thank you piece and it will leave all the other pieces in place perfectly the have your aperture say thank you.
Take your 1" circle punch and add a small thumb hole onto the panel below the die cut area, dd tear and tape to the two square notched tabs you created. Then fold these and adhere onto the inside of the punched piece to create the lid. Add adhesive to the remaining tabs and fold all these towards the plain 4" panel to create the base.
Finally wrap a length of polka dot tulle ribbon around the box above the sentiment, and tie in a square knot.
Here's a list of all the supplies I used in today's project, click on the images to head over to my online store for more information or to place an order- don't forget that all orders over £45 start earning sale a bration freebies!
Product List


 Polka Dot Tulle Ribbon")

 Circle Punch")


See you soon
Vickie
Xxx


.png)
.png)
This is absolutely stunning Vickie xx
ReplyDeleteThank you Jane x
DeleteThis is brilliant Vickie, so pretty xx
ReplyDeleteThank you Emma xxx
DeleteWhat size DSP do you start with?
ReplyDeleteThis comment has been removed by the author.
Delete11" x 6" , sorry xx
Delete