Wednesday 29 December 2021

Let's Celebrate You Greeting Card. Crafty Collaborations Sketch Challenge December 2021

  Good Afternoon Everyone

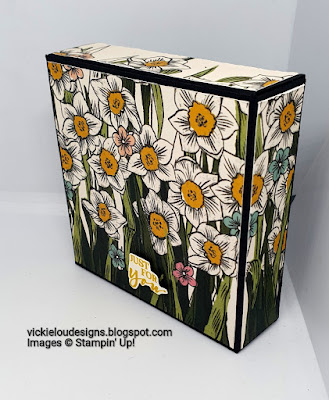
Today's my last Blog Hop with the Crafty Collaborations ladies for 2021. We have a Sketch to follow and it's a fabulous layout, I really loved creating this card. I've used elements from the  Heart & Home Suite which is coming out in the Jan-Jun Mini Catalogue - so do let me know if you need a copy.


Measurements

Cinnamon Cider Card Stock

1pc - 5 7/8" x 8 1/4", scored at 4 1/8"

Basic White Card Stock

1pc - 5 5/8" x 3 7/8"

scraps

Heart & Home DSP

1pc - 5 5/8" x 3 7/8"

1pc - 5 7/8" x 2 1/4"

-------------------------

Take the Cinnamon Cider Card Stock and fold along the score line to create your card base, add the basic white to the inside of the card.

Add the larger rectangle of DSP to the card front.

On the remaining piece of DSP, wrap a length of the Denim along to top edge and secure on the reverse - add this panel to the card front making sure the bottom edge sits flush with the card base.

Stamp the sentiments from Celebrate with Friends in Misty Moonlight ink and fussy cut. Add these to a Basic Gray Doilie and then adhere it to the card.

Finally add three of the Basic Gray Matte Dots to the top left hand side on the DSP.


Please take the time to look at the list below and continue through the Hop, It's full of awesome inspiration - all from this one sketch layout.


Here's a list of all the products currently available to purchase, I will update the details below as soon as the new catalgoue goes live. Product List

Thanks for joining me today, please make sure you sign up to my Newsletters - I send a Weekly Round Up so that you get to see all the projects I have made that week - plus I also send a Monthly email full of news and updates for the upcoming month.

Do get in touch if you would like to see a copy of our Annual Catalogue. I will also be sending out copies of the new Mini Catalogue soon - So let me know if you would like me to get one or both in the post for you. ( Mini catalogues will be despatched late Dec)

If you are on Facebook, why not pop over and check out our community group Craft & Banter. If you have a passion for paper craft, are brilliant at baking or a super talented seamstress then we would love to see you there. We share all types of crafting, run challenges and giveaways & generally have a right good natter.

See you soon 

Vickie 

Xxx

Tuesday 28 December 2021

Boughs & Blossoms A Little Hello Greeting Card - #CCC17

 Good Afternoon Everyone

Today's card is for this week's Creative Colour Challenges #CCC17. I love this week's combo, it's quite soft and sweet - I think there's huge scope to create something wonderful. I decided to use the brand new Boughs & Blossoms stamp set and Punch bundle which is coming out in our New Jan-Jun Mini Catalogue, which is amazing! Be sure to contact me if you want a copy!


Measurements

Coastal Cabana Card Stock

1pc - 5 7/8" x 8 1.4", scored at 4 1/8"

scraps

Calypso Coral Card Stock

1pc - 5 1/2" x 3 1/4"

Crumb Cake Card Stock

1pc - 4" x 2 3/4"

scraps

Basic White Card Stock

1pc - 5 5/8" x 3 7/8"

scraps

------------------------

Take the Coastal Cabana card stock and fold along the score line to create your card base. Stamp the leaft image all over the card front with Coastal Cabana ink. Then add the larger piece of Basic White to the inside.

With the Punch cut out a handful of Coastal Cabana and Crumb Cake leaves. Stamp a selection of the images using Calypso Coral, Coastal Cabana and Crumb Cake inks and fussy Cut.

Now to assemble....

Hold the Calypso Coral card stock Horizontally and gently rip away at the right hand edge, repeat this process for the Crumb cake card stock too.

Stamp the sentiments into the top right hand corner of the Crumb Cake card stock with Calypso Coral ink.

Adhere the Calyspo coral card stock down to the card front towards the left, making sure you have equal borders around the top, left and bottom edges. Only add glue to the straight edges - leave the ripped edge without so that you have a sort of tuck spot.

Repeat the process above with the Crumb Cake card stock, adding it to the Calypso Coral card.

Now, add you punched elements to the card under the calypso coral ripped edge and add a couple of stamped images under the Crumb cake.

Finally add a flower and leaf image on dimensionals into the space on the crumb cake.


I hope you have enjoyed today's card. Please do check out the Creative Colour Challenges blog and see what we are all about, and maybe enter a project of your own. 

Thanks for joining me today, please make sure you sign up to my Newsletters - I send a Weekly Round Up so that you get to see all the projects I have made that week - plus I also send a Monthly email full of news and updates for the upcoming month.

Do get in touch if you would like to see a copy of our Annual Catalogue. I will also be sending out copies of the new Mini Catalogue soon - So let me know if you would like me to get one or both in the post for you. ( Mini catalogues will be despatched late Dec)

If you are on Facebook, why not pop over and check out our community group Craft & Banter. If you have a passion for paper craft, are brilliant at baking or a super talented seamstress then we would love to see you there. We share all types of crafting, run challenges and giveaways & generally have a right good natter.

See you soon 

Vickie 

Xxx

Friday 24 December 2021

Daffodil Afternoon Just for You Gift Box. Ink Stamp Share Sneak Peek Blog Hop December 2021

 Good Afternoon Everyone!

How is it Christmas Eve? I hope you are already for the celebrations tomorrow? I have two very excited Children today!

But, before we crack on with Christmas, I have a project to share with you for the Ink Stamp Share Monthly Blog hop and this one is full of Sneak Peeks of our Upcoming Mini Catalogue and Sale-abration products!

I've decided to use the beautiful Daffodil Afternoon DSP which is a Sale-abration freebie to decorate a simple gift box.


Measurements

Basic Black Card Stock

1pc - 9 1/2" x 6"

Daffodil Afternoon DSP

1pc - 3 3/8" x 3 3/8"

1pc - 3 3/8" x 7/8"

1pc - 3 3/8" x 3 3/8"

2pc - 3 3/8" x 7/8"

Very Vanilla Card Stock

scrap


Take your piece of Basic Black Card stock and score as follows:-

Long Side -  1/2", 4", 5" & 8 1/2"

Short Side - 1/2", 1 1/2" & 5"

Fold and burnish all the score lines well and then cut away so you are left with a shape like this


Now, take your DSP panels and add to the card as below. Make sure the top piece which will form the lid is glued down upside down as you look at it, as this piece folds over. 


Add seal + to the tab on the left hand side and fold this around and adhere tot the opposite side - then at the bottom, fold in the sides back and then adhere down the front to create the base.

Finally stamp the sentiment in Crushed curry ink onto Vanilla card stock and fussy cutting, adding to the box front with mini dimensionals.

Super Easy, Super quick and SUPER pretty.

Thanks for joining me today, Please continue through the hop by clicking the next button below. Deb Naylor is up next and you definitely dont want to miss out on this project.. 


Roll Call

Jo Blackman

Libby Fens

Kim Price

Stacey Marsh

Michelle Bryant

Jacqui Lawrence

Roshnee Patel

Karen Egan

Mo Rootes

Cindy Mitchell-Clark

Gez Carpenter

Jill Chapman

Tricia Butts

Victoria Littlewood

Deb Naylor


Thanks for joining me today, please make sure you sign up to my Newsletters - I send a Weekly Round Up so that you get to see all the projects I have made that week - plus I also send a Monthly email full of news and updates for the upcoming month.

Do get in touch if you would like to see a copy of our Annual Catalogue. I will also be sending out copies of the new Mini Catalogue soon - So let me know if you would like me to get one or both in the post for you. ( Mini catalogues will be despatched late Dec)

If you are on Facebook, why not pop over and check out our community group Craft & Banter. If you have a passion for paper craft, are brilliant at baking or a super talented seamstress then we would love to see you there. We share all types of crafting, run challenges and giveaways & generally have a right good natter.

See you soon 

Vickie 

Xxx

Monday 20 December 2021

All Things Fabulous Greeting Card - Creative Colour Challenges #CCC16

 Good Afternoon Everyone

Today's card is for this week's Creative Colour Challenges #CCC16. I love this week's combo of  Just Jade, Highland Heather and Blackberry Bliss - I think there's huge scope to create something wonderful. I decided to dig out the All Things Fabulous stamp set, which I haven't used in a while and I love the results.


Measurements

Just Jade Card Stock

1pc - 4 1/8" x 11 3/4" scored at 5 7/8"

Blackberry Bliss Card Stock

1pc - 2" x 4 7/8"

Basic White Card Stock

1pc - 5 5/8" x 3 7/8"

1pc - 4 1/2" x 3 1/4"

scraps

------------------------

Take the Just Jade card stock and fold along the score line to create your card base, then add the larger piece of Basic White to the inside.

On the smaller piece of basic white stamp the sentiments towards the top. The single line in Highland Heather ink and the double line stamp in just jade ink. Add the strip of Blackberry Bliss Card Stock to the right hand side making the bottom edge flush with the edge of the basic white and create a border along a third of the top and the right hand edge, glue this down to the card front.

Using scraps of basic white, stamp the images and then fussy cut. I stamped the leaves in first and second generation Just Jade. The flowers were stamped in Blackberry Bliss and Highland Heather. Ass these flowers are a layering set, I started with lighter colours for the larger, more solid stamps and then went darker towards to more detailed stamps - again using first and second generation stamping.

Create a cluster of flowers and leaves in the bottom left hand corner. I used liquid glue and dimensionals to get different heights to provide depth to my arrangement.

Finally add a highland heather coloured Pastel Pearl to the centre of the three smaller flowers.

I hope you have enjoyed today's card. Please do check out the Creative Colour Challenges blog and see what we are all about, and maybe enter a project of your own. 

Here's a list of supplies I used in today's project, click on the images to head over to my online store Product List


Thanks for joining me today, please make sure you sign up to my Newsletters - I send a Weekly Round Up so that you get to see all the projects I have made that week - plus I also send a Monthly email full of news and updates for the upcoming month.

Do get in touch if you would like to see a copy of our Annual Catalogue. I will also be sending out copies of the new Mini Catalogue soon - So let me know if you would like me to get one or both in the post for you. ( Mini catalogues will be despatched late Dec)

If you are on Facebook, why not pop over and check out our community group Craft & Banter. If you have a passion for paper craft, are brilliant at baking or a super talented seamstress then we would love to see you there. We share all types of crafting, run challenges and giveaways & generally have a right good natter.

See you soon 

Vickie 

Xxx

Sunday 19 December 2021

Henna Hearts Monochrome Birthday Card. Crafty Collaborations Share it Sunday Blog Hop

  Good Afternoon Everyone

I'm taking part in the Crafty Collaborations Share it Sunday blog hop, and there's no theme, we just share something we have been making with our Beloved Stampin Up Supplies

I've used the Henna Hearts stamp set today to make a start on some birthday cards. I wanted to go all out monochrome on this card as I thought the image would look fab, and I think it does - what do you think?


Measurements

Basic Black Card Stock

1pc - 4 1/8" x 11 3/4", scored at 5 7/8"

1pc - 1" x 3 7/8"

scraps

Basic White Card Stock

2pc - 5 5/8" x 3 7/8"

scraps

---------------

Take the Basic Black and fold along the score line to create your card base. Add one of the basic white card pieces of the inside.

On the other piece of white, stamp the heart image mainly into the four corners.

Add this to the card front.

Place the 1" strip of basic black card stock along to centre of the card.

Stamp another heart image onto scrap and fussy cut. adhere to a scrap of basic black and fussy cut creating a black mat - add the to the centre of the card over the black strip.

On another piece of scrap white stamp the sentiment from Sweet as a piece and fussy cut, this time adding to the centre of the card with mini dimensionals.

Finally add some matte balck dots.

Please continue through the list below and check out what everyone else has been making today

Here's a list of supplies I used in today's project, click on the images to head over to my online store Product List


Thanks for joining me today, please make sure you sign up to my Newsletters - I send a Weekly Round Up so that you get to see all the projects I have made that week - plus I also send a Monthly email full of news and updates for the upcoming month.

Do get in touch if you would like to see a copy of our Annual Catalogue. I will also be sending out copies of the new Mini Catalogue soon - So let me know if you would like me to get one or both in the post for you. ( Mini catalogues will be despatched late Dec)

If you are on Facebook, why not pop over and check out our community group Craft & Banter. If you have a passion for paper craft, are brilliant at baking or a super talented seamstress then we would love to see you there. We share all types of crafting, run challenges and giveaways & generally have a right good natter.

See you soon 

Vickie 

Xxx

Monday 13 December 2021

Dragonfly Garden Thank You Card - Creative Colour Challenges #CCC15

  Good Morning Everyone

Its Monday!! Hope you all had a fabulous weekend. Im sharing this week's brand new Creative Colour Challenges combo with you today and they gorgeous Card I made for it. 

I love this mix of colours, and I think I've made them work well together with the Dragonfly Garden bundle, what do you think?


Measurements

Rich Razzleberry Card Stock 

1pc - 4 1/8" x 11 3/4", scored at 5 7/8"

1pc - scrap

Pear Pizzazz Card Stock 

1pc - 1 1/2" wide strip

1pc - scrap

Balmy Blue  Card Stock 

1pc - 1/2" wide strip

1pc - 3/4" wide strip 

1pc - scrap

Basic White  Card Stock 

1pc - 5 5/8" x 3 7/8"

1pc - 2 3/4" x 4 1/2"

---------------‐-------------------

Fold the Rich Razzleberry csrd atock along the score line and butnish to create your card base. Add the larger piece of Basic White to the inside. 

Adhere the strips of Balmy Blue and Pear Pizzazz to the card front on a diagonal, trimming off and overhanging edges. You can adapt the widths if you like, I just have these measurements as this is how they can out of my scrap pile. 

Stamp the flowers image onto the remaining piece of white twice, one image slightly higher than the other in pear pizzazz ink. Adding the sentiment to the top left hand side in Rich Razzleberry ink. Take this panel and add a thin line of rich Razzleberry ink to the edge. Do this by holding the card on its side and very gently tapping it straight onto the ink pad. Make sure you let it dry completely.

Add this panel to the centre of the card front.

Stamp the  3 dragonflies onto scraps using the same colour ink and Cardstock. Cut them out with the Dragonfly punch. Layer these three on top of each other and adhere together just adding a thin line of glue down the body so that the wings stay free.

Add this to the card front and gently pull up the wings to give dimension and so you can see all three colours.

Here's a list of supplies I used in today's project, click on the images to head over to my online store Product List


Thanks for joining me today, please make sure you sign up to my Newsletters - I send a Weekly Round Up so that you get to see all the projects I have made that week - plus I also send a Monthly email full of news and updates for the upcoming month.

Do get in touch if you would like to see a copy of our Annual Catalogue. I will also be sending out copies of the new Mini Catalogue soon - So let me know if you would like me to get one or both in the post for you. ( Mini catalogues will be despatched late Dec)

If you are on Facebook, why not pop over and check out our community group Craft & Banter. If you have a passion for paper craft, are brilliant at baking or a super talented seamstress then we would love to see you there. We share all types of crafting, run challenges and giveaways & generally have a right good natter.

See you soon 

Vickie 

Xxx

Sentimental Park Thank you Card. Inspire Create Challenges #163 Colour Challenge

  Good Afternoon Everyone, Happy Monday! Today I'm sharing a card I've made for the current Inspire Create Challenge - #163 which i...