Tuesday 28 February 2023

Favored Flowers Thank You Card. Crazy Challenge Insta Hop. February 2023

 Good Afternoon Everyone

So it's the last day in February - anyone else where it's gone! I know it's a short month, but still it seems to have flown by! 

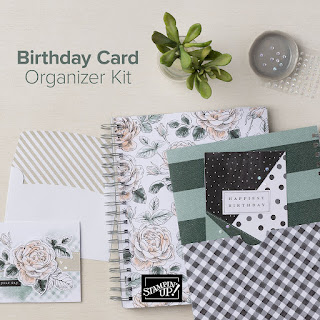
It also means that Saleabration is ending today! So I've taken the opportunity to use the Favored Flowers DSP just one more time - I absolutely love this paper and am seriously saddened that it will no longer be available after today! 

So, before I get into the card - please please get your orders in if you are wanting to get some of the Saleabration items for FREE. Also, it marks the end of the most amazing joining offer i have ever seem - so again, do check that out before the day it through!

OK, so on to my card - what do you think? Simple but very effective, right?


Measurements

Basic Black Card Stock

1pc - 5 7/8" x 8 1/4", scored at 4 1/8"

scraps

Basic White Card Stock

1pc - 5 5/8" x 3 7/8"

scrap

Favored Flowers DSP

1pc - 4" x 3 3/4"

scraps

---------------------------------------------

Fold your Basic Black Card stock along the score line to create your card base, adding the Basic White piece to the inside.

Bring in your Mini Cut & Emboss machine along with your Beautiful Shapes Dies and cut out three large hexagons in basic black and the next size down in DSP. Also cut the label from Fragrant Flowers Dies in Basic White.

Layer up the DSP hexagons onto the black hexagons and arrange on the DSP. Trim off any overhanging pieces so that all the edges are straight. Layer this to the card front.

Finally stamp the sentiment in memento onto the basic white label and add to the card front using dimensionals.

Job Done - Because of the super pretty detailing to the DSP - you don't have to do much to make it look good! haha.

Here's a list of supplies I used in today's project, click on the images to head over to my online store Product List


If you are on Facebook, why not pop over and check out our community group Craft & Banter. If you have a passion for paper craft, are brilliant at baking or a super talented seamstress then we would love to see you there. We share all types of crafting, run challenges and giveaways & generally have a right good natter.

See you soon 

Vickie 

Xxx


Sunday 26 February 2023

Just Wanted to Say Country Floral Lane Greeting Card. Crafty Collaborations Share it Sunday. February 2023

 Good Afternoon Everyone

Today I'm taking part in the Crafty Collaborations Share it Sunday Blog Hop - for this hop we do not have a set theme - just the opportunity to create a project using our fabulous Stampin Up Supplies.

I have created a lovely card to remind a friend that I'm very thankful to have them in my life! The Country Floral Lane Suite is a great suite to show some love!


Measurements

Night of Navy Card Stock

1pc - 11 3/4" x 4 1/8", scored at 5 7/8"

scraps

Basic White Card Stock

1pc - 5 5/8" x 3 7/8"

scraps

Country Floral Lane Card Stock

1pc - 5 5/8" x 3 7/8"

1pc - 3 3/8" x 5 5/8"

--------------------------------------------------

Take the Night of Navy Card stock and fold along the score line to create your card base. Add the Basic White panel to the inside.

Layer up the two pieces of DSP. I chose these sizes specifically to have just a thin line with the heart down either side, but depending on the pattern you are using - you could change this up. Add this to the card front.

On scraps of Basic White stamp the sentiments in Sweet Sorbet ink trin and layer onto scraps of Night of Navy card. 

Next, stamp the Heart onto a scrap of Basic White. This image is created by stamp two images over the top of each other. Each stamp has different areas, so you can ink up the leaves in one colour and the flowers and hearts in another easily. So, take the leaves and ink up Mint Macaron and stamp. Then ink up the other stamp in Petal Pink, then hover your stamp directly over the leaves, and you will see where to position it to 'fill in' to get the heart shape. Fussy cut, layer onto Night of Navy card stock and trim so you have a nice border.

Add the heart into the centre of the card front, with a sentiment to the top and one to the bottom, spacing evenly - adhere with dimensionals.

Finally add some of the adhesive backed pastel sequins.

I hope you have enjoyed my card today - please take a look at the list below and continue through the hop to get lots more crafting inspiration.

Blog Hop Index

Here's a list of supplies I used in today's project, click on the images to head over to my online store Product List


If you are on Facebook, why not pop over and check out our community group Craft & Banter. If you have a passion for paper craft, are brilliant at baking or a super talented seamstress then we would love to see you there. We share all types of crafting, run challenges and giveaways & generally have a right good natter.

See you soon 

Vickie 

Xxx


Saturday 25 February 2023

Pretty Medallion Wishing you the Happiest of Birthdays Card. Ink Stamp Share Colour Challenge Blog Hop. February 2023

 Good Afternoon Everyone

Today I am blog hopping with the Ink Stamp Share Group and our theme in 'Black & White with a Pop of Colour'. 

I love these theme and thought that a bit of white heat embossing with the Pretty Medallion stamp set with my Pop of colour coming from some Polished Pink accents.


Measurements

Basic Black Card Stock

1pc - 5 7/8" x 8 1/4", scored at 4 1/8"

1pc - 5 5/8" x 3 7/8"

Polished Pink Card Stock

1pc - 4" x 3 3/4"

scrap

Basic White Card Stock

1pc - 3 7/8" x 5 5/8"

--------------------------------------------------

Take the larger piece of Basic Black card stock and fold along the score line to create your card base, adding the Basic White piece to the inside and the Polished Pink card to the front.

Ink up the Pretty Medallion stamp in versamark ink and stamp into the centre of  the remaining piece of Basic Black card stock.

Sprinkle with White embossing powder and heat set with you Heat tool. Add this panel to the card front.

Stamp the Sentiment onto a scrap of Polished Pink card stock and cut out using the coordinating die.

Add this to the centre of the card front with dimensionals.

I hope you have enjoyed my card today, please take a look at the list below and continue through the hop for lots more crafting inspiration.

Blog Hop Index

Here's a list of supplies I used in today's project, click on the images to head over to my online store Product List


If you are on Facebook, why not pop over and check out our community group Craft & Banter. If you have a passion for paper craft, are brilliant at baking or a super talented seamstress then we would love to see you there. We share all types of crafting, run challenges and giveaways & generally have a right good natter.

See you soon 

Vickie 

Xxx

The Project Share Project - 25th April 2024

  Good Morning Everyone, Happy Thursday and welcome to The Project Share Project.  Every Thursday we will all share an individual blog post ...